User Guide
Welcome to the FlexKVM User Guide! This section will help you understand the various features of FlexKVM.
Prerequisites
Before proceeding, we recommend learning about the detailed hardware configuration of the product.
1. Hardware Specifications
1.1 Core Parameters
| Parameter | Specification |
|---|---|
| Processor | High-performance encoding processor (256MB memory, SiP package, low power) |
| Network | Dual-band WiFi 6 (up to 300Mbps), 100Mbps Ethernet |
| Bluetooth | Bluetooth 5.4 (supports network configuration, future expansion) |
| HDMI Input | Up to 1920x1200@60fps support |
| Display | 0.77 inch monochrome OLED, 128x64 resolution |
| Power | USB 5V/1A |
1.2 Hardware Interfaces
| Interface | Quantity | Description |
|---|---|---|
| HDMI IN | 1 | Video input |
| USB 2.0 | 2 | 1 data port, 1 power port |
| 100Mbps Ethernet | 1 | Wired network |
| ATX Port | 1 | USB form factor serial communication |
| TF Card Slot | 1 | Storage expansion |
| GPIO | 2 | 3.3V (reserved) |
| UART TTL | 1 | 3.3V (reserved) |
2. Network Configuration
2.1 Network Mode Comparison
| Mode | Pros | Cons | Use Case |
|---|---|---|---|
| Wired Network | Stable, low latency | Requires cabling | Fixed installation environment |
| WiFi Network | Flexible, no cabling | Signal dependent | Office environment |
| AP Mode | Plug and play | No internet access | Temporary configuration |
2.2 Wired Network Configuration
Device defaults to DHCP for automatic IP acquisition. For static IP configuration:
- Go to Settings → Network → Wired Network
- Select Static IP mode
- Fill in IP address, subnet mask, gateway, DNS
- Click Save
2.3 WiFi Network Configuration
Scan and Connect
- Go to Settings → Network → WiFi Network
- Click "Scan" button
- Select WiFi network from list
- Enter password and click Connect
Manually Add Hidden Network
- Go to WiFi settings page
- Click "Add Hidden Network"
- Enter SSID and password
- Select security type (WPA2/WPA3)
- Click Save
2.4 AP Mode (Hotspot)
AP mode is used for initial network configuration or emergency access when network fails.
Enable Method:
- Long press Button B for 3 seconds to switch to AP mode
- Or manually enable in settings
AP Mode Parameters:
- Default SSID:
FlexKVM_XXXX(last 4 digits of device serial number) - Default Password: See device label or OLED screen
- Management Address:
192.168.4.1
2.5 Static IP vs DHCP
Go to Settings → Network → Wired Network:
- DHCP: Automatic IP address acquisition (recommended)
- Static IP: Manual network parameter configuration
For static IP, fill in:
- IP Address
- Subnet Mask
- Gateway
- DNS Server (optional)
3. Login
3.1 First Login
On first access, the system will guide you to create an administrator account:
| Field | Requirements |
|---|---|
| Username | 4-32 characters, letters/numbers/underscore/dot/hyphen |
| Password | 8-32 characters, printable characters, no spaces |
3.2 Regular Login
After account creation, login requires:
- Username
- Password
- 2FA verification code (if enabled)
3.3 User Management
FlexKVM uses single-user design, currently supporting only one administrator user.
Change Password:
- Go to Settings → Account → Account Info
- Click "Change Password"
- Enter old and new password
- Confirm change
2FA Two-Factor Authentication:
- Go to Settings → Account → 2FA Verification
- Click "Generate 2FA"
- Scan QR code with Authenticator App
- Enter 6-digit verification code to complete binding
8-digit backup codes will be generated after enabling 2FA. Please copy and save immediately.
4. Feature Introduction
4.1 Main Interface
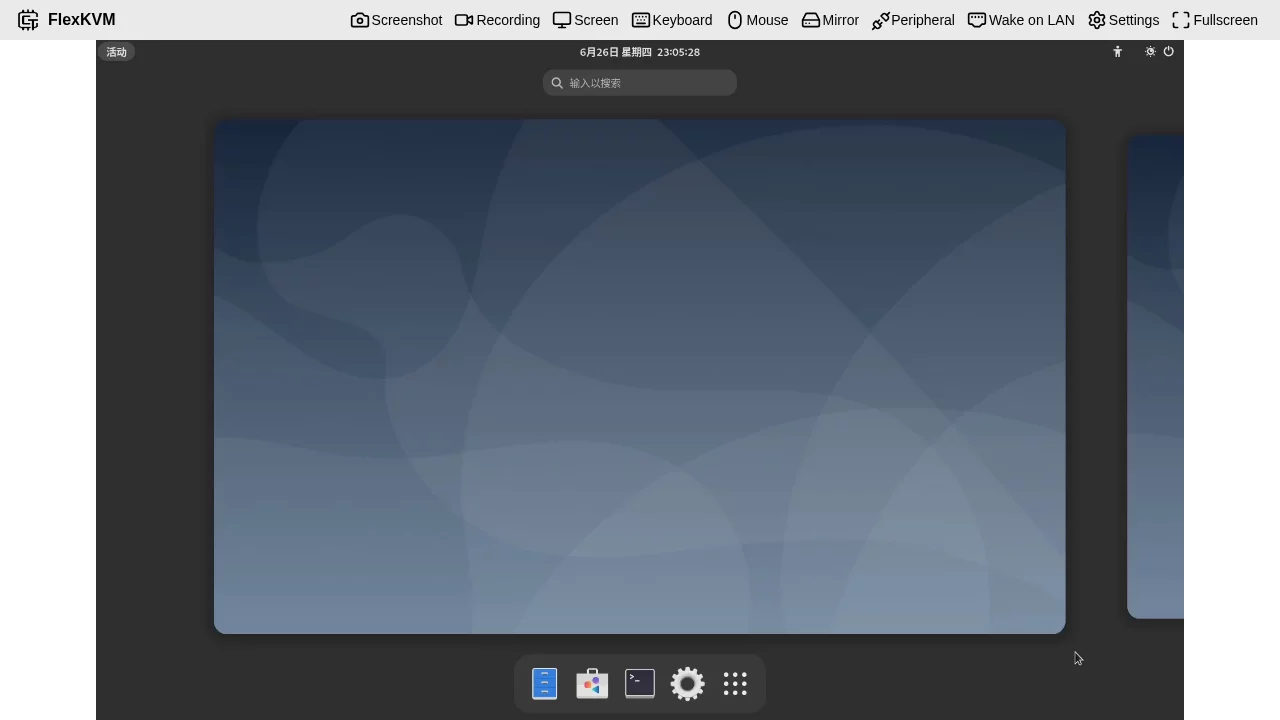
The main interface consists of:
- Top Menu Bar: Quick function access
- Video Area: Real-time display of controlled device
- Status Bar: Connection status and resolution information
4.2 Menubar Introduction
Screenshot Function
Click "📷 Screenshot" button:
- Save current frame as PNG image
- Auto-download to browser default directory
Recording Function
Click "🎥 Recording" button:
- Start/Stop video recording
- Video saved to TF card
- Support long-duration recording
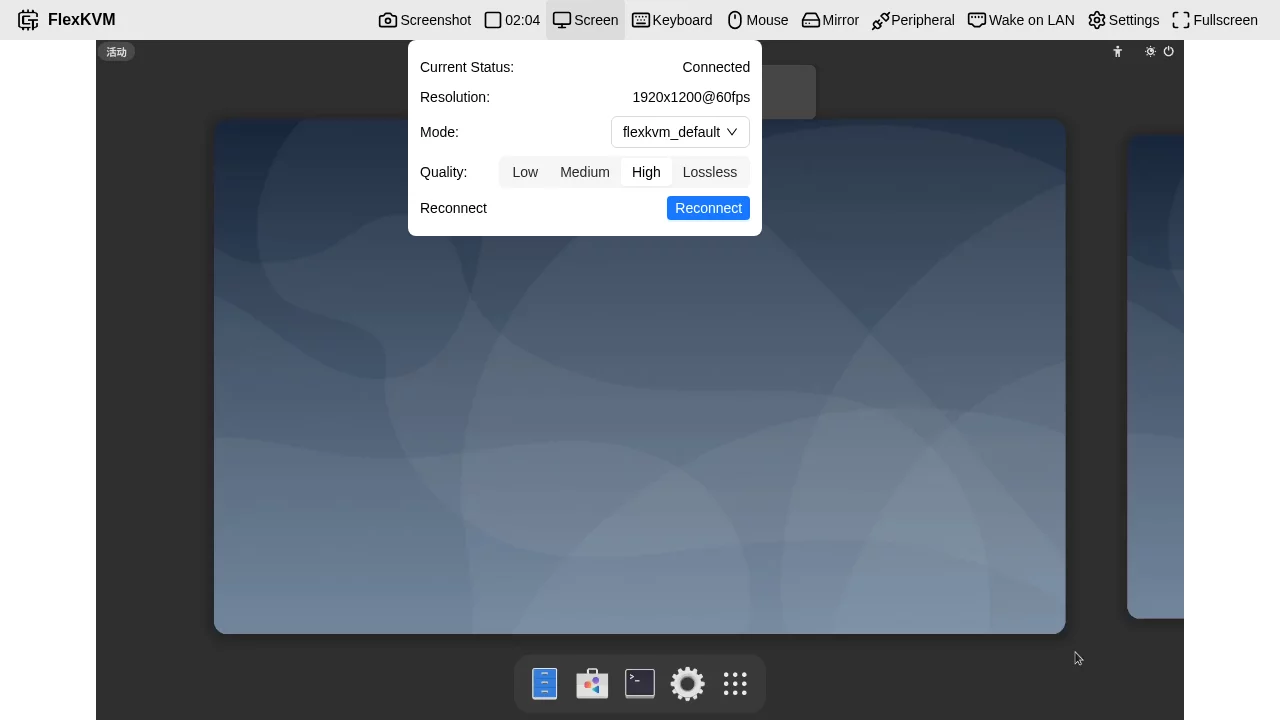
Screen Settings
Click "🖥️ Screen" menu:
| Option | Description |
|---|---|
| Quality | Low/Medium/High/Lossless |
| Reconnect | Re-establish video connection |
| Video Effects | Adjust brightness/contrast/saturation |
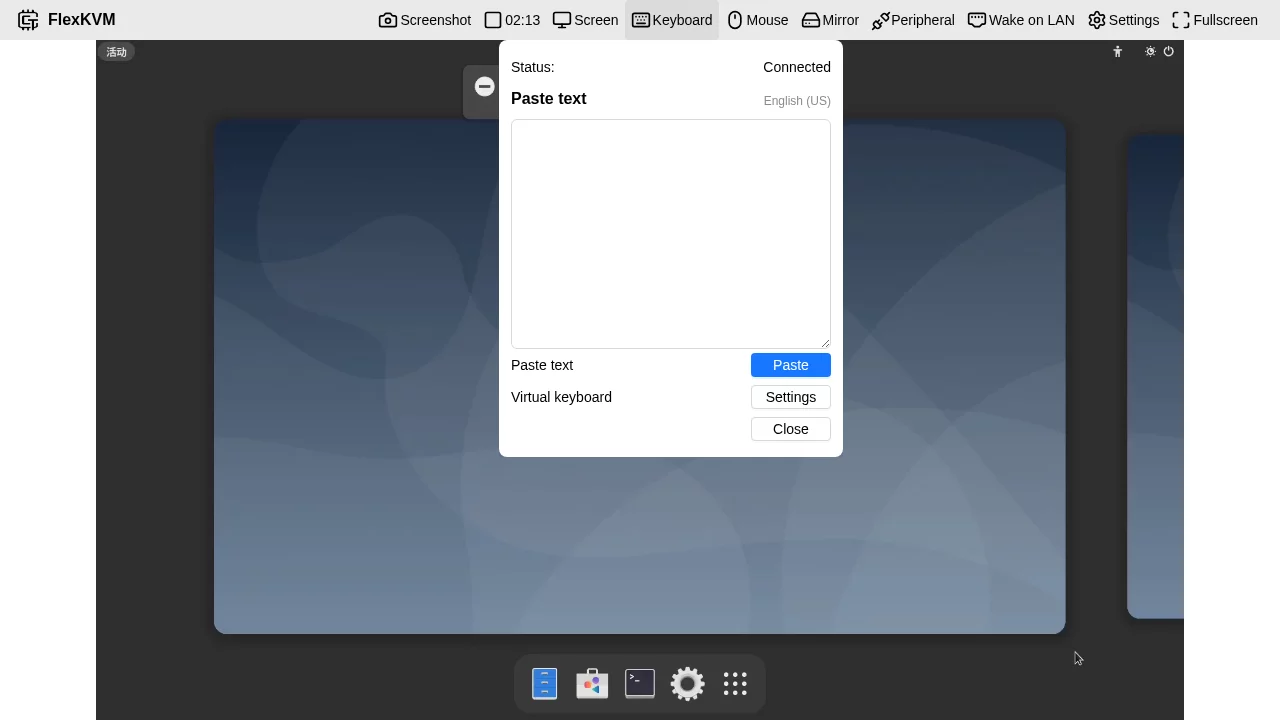
Keyboard Settings
Click "⌨️ Keyboard" menu:
| Option | Description |
|---|---|
| Paste Text | Send English text to controlled device |
| Virtual Keyboard | Open on-screen virtual keyboard |
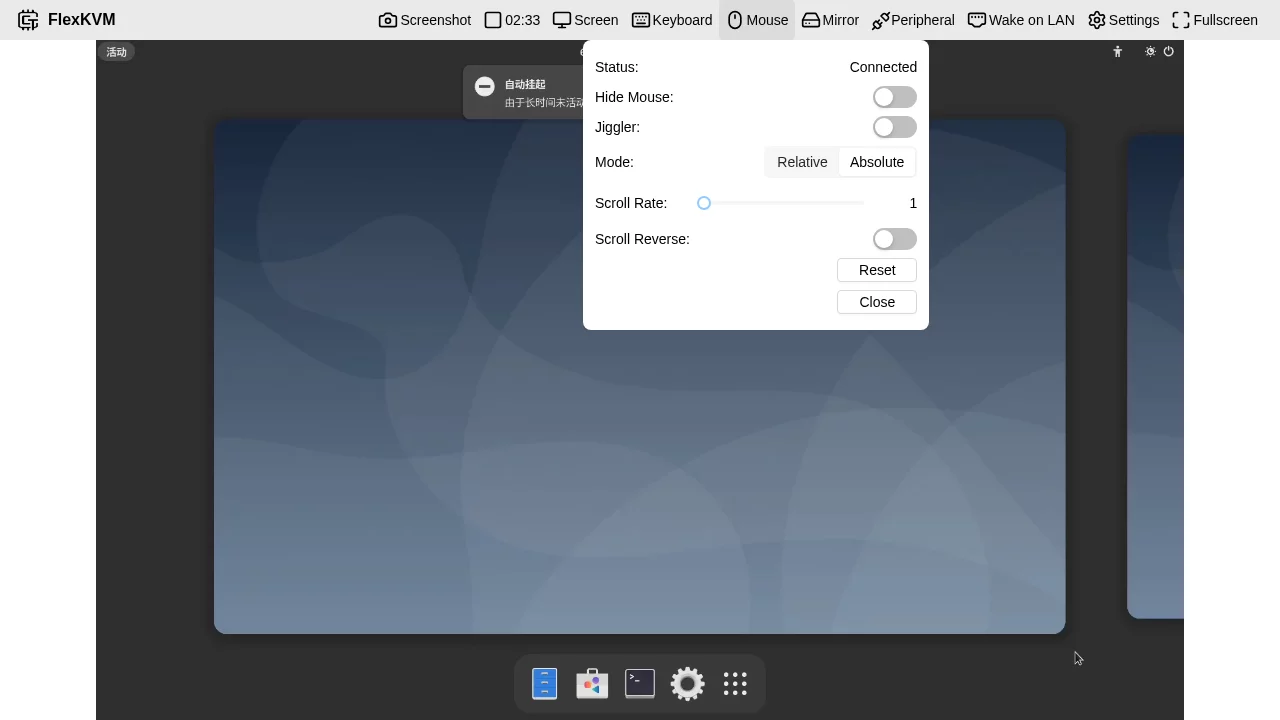
Mouse Settings
Click "🖱️ Mouse" menu:
| Option | Description |
|---|---|
| Hide Mouse | Hide local mouse cursor |
| Jiggler | Auto-move to prevent controlled device sleep |
| Mode | Absolute/Relative mode |
| Scroll Reverse | Reverse scroll direction |
| Scroll Rate | Adjust scroll sensitivity |
| Reset | Restore default settings |
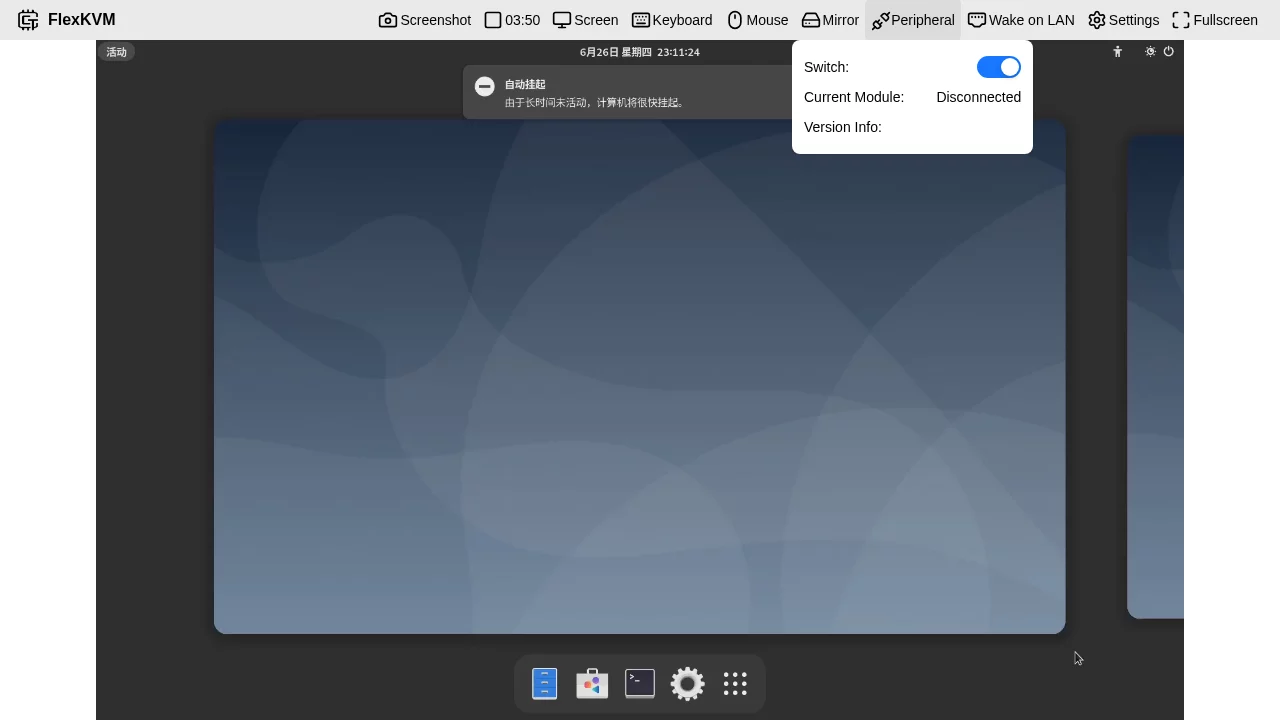
Peripheral Control
Click "⚡ Peripheral" menu:
| Button | Action |
|---|---|
| Power Short Press | Power on/Normal shutdown |
| Power Long Press | Force shutdown |
| Reset | Restart device |
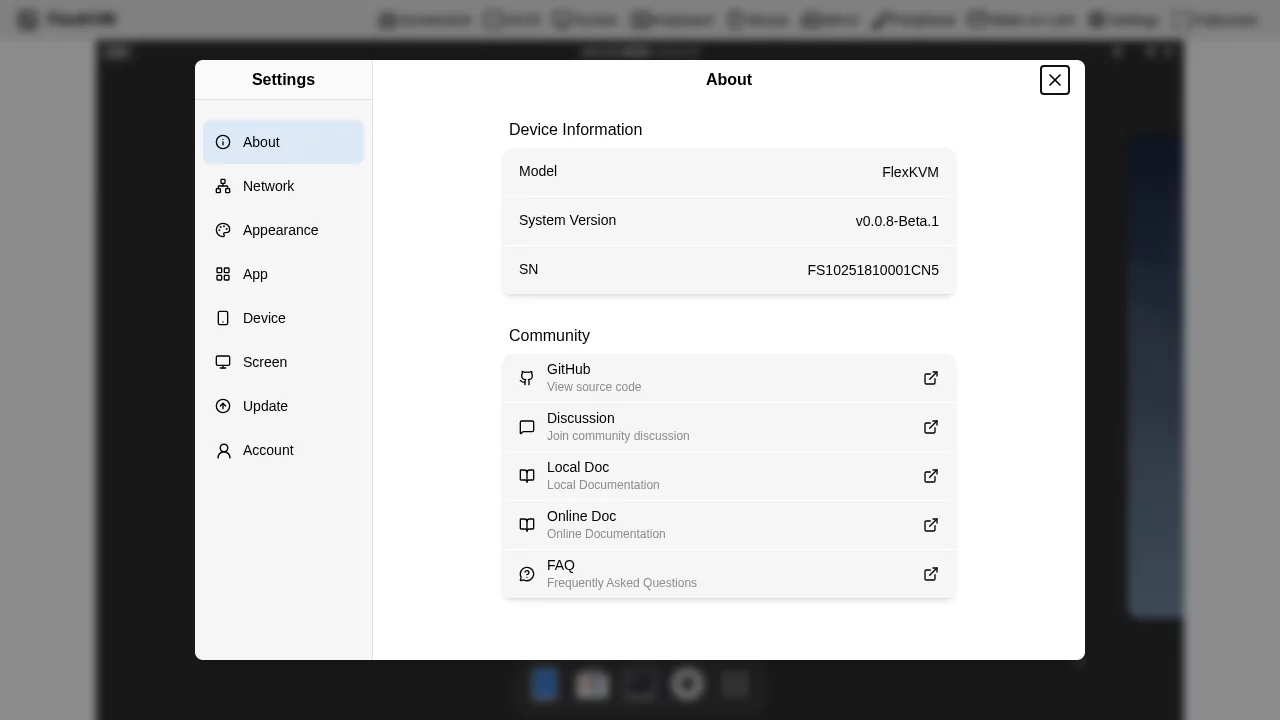
4.3 Settings Introduction
Network Settings
WiFi Network:
- Scan and connect to WiFi
- Add hidden networks
- View saved networks
Wired Network:
- Enable/Disable wired network
- DHCP/Static IP switch
- Configure IP/Subnet Mask/Gateway/DNS
AP Network:
- Enable/Disable AP mode
- Configure SSID and password
- Set maximum client connections
Appearance Settings
Theme:
- Light mode
- Dark mode
- Auto (follow system)
Accent Color:
Options: Blue, Teal, Green, Gold, Orange, Red, Pink, Purple, Gray
Language:
- Simplified Chinese
- English
Device Settings
OLED Settings:
| Parameter | Range | Description |
|---|---|---|
| Brightness | 0-100% | Screen brightness |
| Sleep Time | 10s-Never | Auto screen off after inactivity |
Time Settings:
- Auto-sync NTP server
- Manual timezone setting
- Support RTC hardware clock
SSH:
- Enable/Disable SSH service
- For command line debugging
HTTPS:
- Self-signed certificate (default)
- Custom certificate (upload PEM format)
Log Management:
- View system operation logs
- Download log archives
- Clear logs
Event Log:
- Record user operation events
- Support pagination view
- Exportable download
Factory Reset:
- Software reset (via settings page)
- Hardware reset (long press reset button)
Reboot:
- Soft reboot (safe restart)
- Hard reboot (power cycle - not recommended)
Screen Settings
Custom EDID:
For resolving graphics card compatibility issues:
- Obtain target monitor's EDID data (hexadecimal)
- Paste into EDID input box
- Click Submit
- Reconnect HDMI
Video Effects Switch:
Enable direct adjustment of brightness, contrast, saturation from main interface menu bar.
Account Settings
- Change password
- 2FA verification configuration
- Scratch card backup codes
Update Settings
Online Update:
- Click "Check for Updates"
- If new version available, changelog will be displayed
- Click "Update Now"
- Wait for download and installation completion
Pioneer Program:
Enable to receive beta version updates.
TF Card Offline Update:
- Place
update_ota.tarin TF card/otadirectory - Insert TF card into FlexKVM
- Go to TF Offline Update page
- Click Start Update
OTA Image Upload Update:
- Upload
.tarfirmware file (max 50MB) - System auto-verifies SHA256
- Click upgrade after verification passes

Application Settings
Tailscale:
- Go to Settings → App → Tailscale
- Click "Login"
- Complete Tailscale account authorization
- Get Tailscale IP address
Access FlexKVM via Tailscale IP for remote access from anywhere.
5. Virtual Media (USB Gadget)
FlexKVM can emulate as USB device to provide storage functionality to controlled computer.
Usage Steps
- Go to Settings → Device → USB Gadget
- Select mode:
- CD-ROM: For system installation
- Storage Device: For file transfer
- Select or upload image file
- Click "Mount"
- Operate on controlled computer
Custom Gadget
Support custom parameters:
- Vendor ID: 4-digit hexadecimal (e.g., 0x1234)
- Product ID: 4-digit hexadecimal (e.g., 0x5678)
- Manufacturer Name: Up to 64 characters (English)
- Product Name: Up to 64 characters (English)
6. Wake on LAN (WOL)
Wake controlled device remotely via network.
Configuration Steps
- Go to Settings → Wake on LAN
- Add device:
- Device Name (English)
- MAC Address
- Save configuration
Usage
Click "🌐 Wake on LAN" in menu bar, select device to send wake packet.
7. Troubleshooting
7.1 Common Issues
Cannot Access Web Interface
- Check if device is powered on
- Confirm network connection is normal
- Try accessing via IP directly
- Check firewall settings
Black Screen
- Check HDMI cable connection
- Confirm controlled device has video output
- Try replacing HDMI cable
- Check if resolution is supported
Mouse/Keyboard Not Responding
- Check USB Data cable connection
- Try re-plugging USB cable
- Switch mouse mode (Absolute/Relative)
- Restart controlled device
Network Connection Failed
- Check Ethernet/WiFi configuration
- Confirm router DHCP is normal
- Try static IP configuration
- Check firewall rules
7.2 Get Help
- GitHub Issues: https://github.com/kalous12/FlexKVM/issues
- Community: https://github.com/kalous12/FlexKVM/discussions
- FAQ: FAQ
Appendix
A. Technical Specifications
| Item | Specification |
|---|---|
| Operating Temperature | 0°C ~ 50°C |
| Storage Temperature | -20°C ~ 70°C |
| Operating Humidity | 10% ~ 90% RH |
| Power Consumption | < 2W |
| Dimensions | 60mm × 50mm × 30mm |
| Weight | Approx. 50g |
B. Browser Compatibility
| Browser | Minimum Version | Recommended Version |
|---|---|---|
| Chrome | 90+ | Latest |
| Edge | 90+ | Latest |
| Firefox | 88+ | Latest |
| Safari | 14+ | Latest |
C. Port Reference
| Port | Protocol | Usage |
|---|---|---|
| 443 | TCP | HTTPS Web Interface |
| 22 | TCP | SSH Remote Login |
| 41641 | UDP | Tailscale WireGuard |
Document Version: v1.0 Applicable Firmware: v0.0.8-Beta.1 and above Last Updated: 2026-03-27