Recording
Record the remote display as a video file — useful for documenting operations or keeping evidence.
How to Record
Use the recording icon in the top bar:
| Icon | State |
|---|---|
 | Idle, click to start |
 | Recording, click to stop |
Start: Click the record button → "Recording started" toast appears. The button turns into a timer (e.g., 05:23).
Stop: Click the timer → "Recording saved" toast → video auto-saves to your browser's download directory.
Recording doesn't stop automatically — you must click Stop manually. Closing the browser or refreshing the page also stops it. If the video stream disconnects unexpectedly, recording stops automatically (no notification).
File Naming
flexkvm-recording-YYYY-MM-DDTHH-MM-SS.{extension}
e.g., flexkvm-recording-2026-05-12T21-44-20.mp4
Recording Settings
Adjust in Settings → System → Recording Settings.
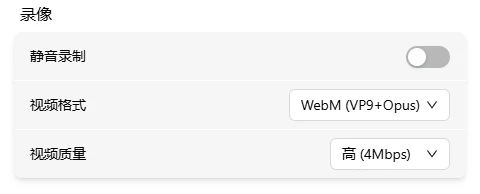
Mute Recording
When enabled, the video contains no audio.
Video Format
| Format | When to use |
|---|---|
| WebM (VP9+Opus) | Default, good quality |
| WebM (VP8+Opus) | Legacy device compatibility |
| MP4 (H.264) | Best compatibility — plays on most media players |
Video Quality
| Quality | Bitrate | When to use |
|---|---|---|
| Low | 1 Mbps | Smallest file possible |
| Medium | 2 Mbps | Daily recording |
| High | 4 Mbps | More detail |
| Ultra | 8 Mbps | Best quality |
No audio in recording? → Check if mute recording is enabled, and whether the host has audio output.
File won't play? → Switch to MP4 (H.264) for best compatibility.
Laggy or dropped frames? → Lower the resolution or quality in Remote Display to reduce encoding load.
Do not switch quality or EDID during recording — the recorded video may glitch or become corrupted. Recording doesn't stop when the host sleeps or HDMI disconnects — the display shows the corresponding message instead.