WiFi
Connect to WiFi for wireless networking. Supports 2.4GHz and 5GHz dual-band — 2.4G penetrates walls better and covers wider areas; 5G has lower latency, ideal for video. Works as mutual backup with Ethernet — each link has its own IP, either one can reach the management interface, and if one drops the other keeps working.
When using Ethernet and WiFi together, place them on different subnets to avoid routing conflicts. For example, Ethernet on
192.168.1.x, WiFi on192.168.2.x.
Specifications
| Item | Details |
|---|---|
| Wireless protocol | 802.11 a/b/g/n/ac/ax |
| Band | Dual-band 2.4GHz / 5GHz |
| Antenna | SMA male |
| Default state | Enabled |
| MAC address | See packaging box label |
OLED Display
After WiFi connects, the "X" on the OLED network icon disappears and the second line shows the IP address. IP prefix is W (e.g., W192.168.1.100), W = Wireless.
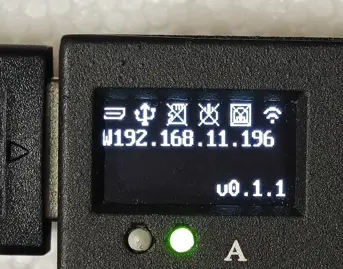
While acquiring IP, the display shows W Loading.... If it takes more than 10s → check WiFi connection or router DHCP.
When WiFi is disconnected, the network icon always has an "X". More OLED status info → OLED Screen.
Button Switch
Long-press Button B for about 3–5 seconds to quickly toggle between WiFi and AP Mode:
| Current mode | Action | Result | OLED icon | Wait time |
|---|---|---|---|---|
| WiFi mode | Long-press Button B 3–5s, release when OLED shows hotspot icon | Turns off WiFi, turns on hotspot | 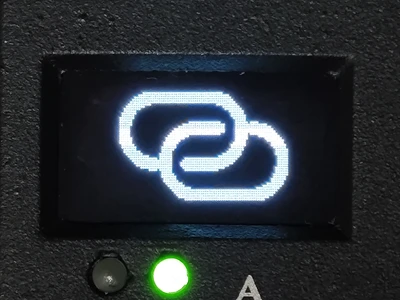 | ~10 seconds |
| Hotspot mode | Long-press Button B 3–5s, release when OLED shows WiFi icon | Turns off hotspot, restores WiFi | 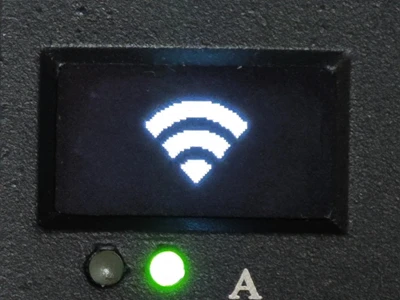 | 3~4 seconds |
Button B toggles WiFi/hotspot. Provisioning Mode (Button A) is a temporary hotspot for first-time setup or recovery. They are different.
Software Configuration
Go to Web interface → Settings → Network.
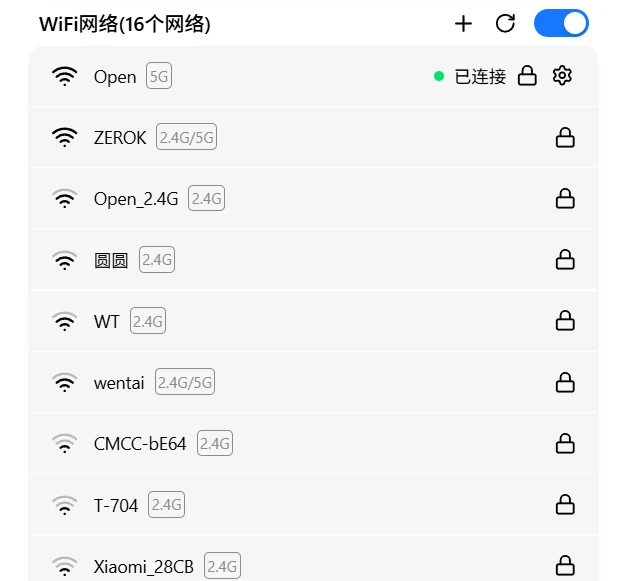
Scan Networks
Click the refresh button to scan manually, or wait for the device to auto-scan every 40 seconds. The button rotates while scanning, and the list auto-updates when complete.
Enable / Disable
Click the card's toggle on the right. Turning off WiFi disables the wireless interface. Saved networks and configurations are preserved.
Turning off both WiFi and Ethernet means you can't access the device. Keep at least one enabled.
Network Cards
Scanned WiFi networks are shown as a card list. Each card displays: SSID, signal strength (four bars), frequency band (2.4G / 5G / dual-band), security type, and status label.
Click a card to expand action buttons. Available actions vary by card state:
Connected
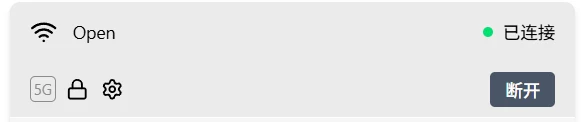
- Disconnect: Disconnect from the current network
- Settings: Open network configuration dialog (IP mode, DNS, MAC)
Saved (not connected)
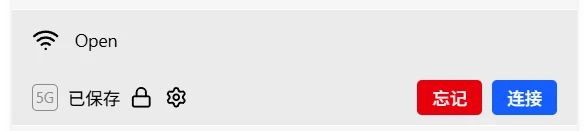
- Connect: Connect to this network
- Forget: Remove from saved list
- Settings: Open network configuration dialog
Unsaved
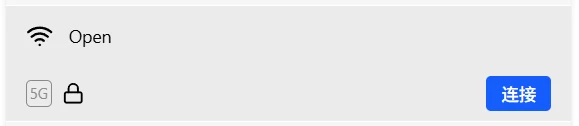
- Connect: Connect to this network
Each saved network can have independent IP configuration — settings auto-switch when you change WiFi networks.
Connect to a Network
Expand the target network card, then proceed by network type:
Open network: Expand the card → click Connect. No password needed.
Encrypted network: Expand the card → click Connect → enter password → confirm.
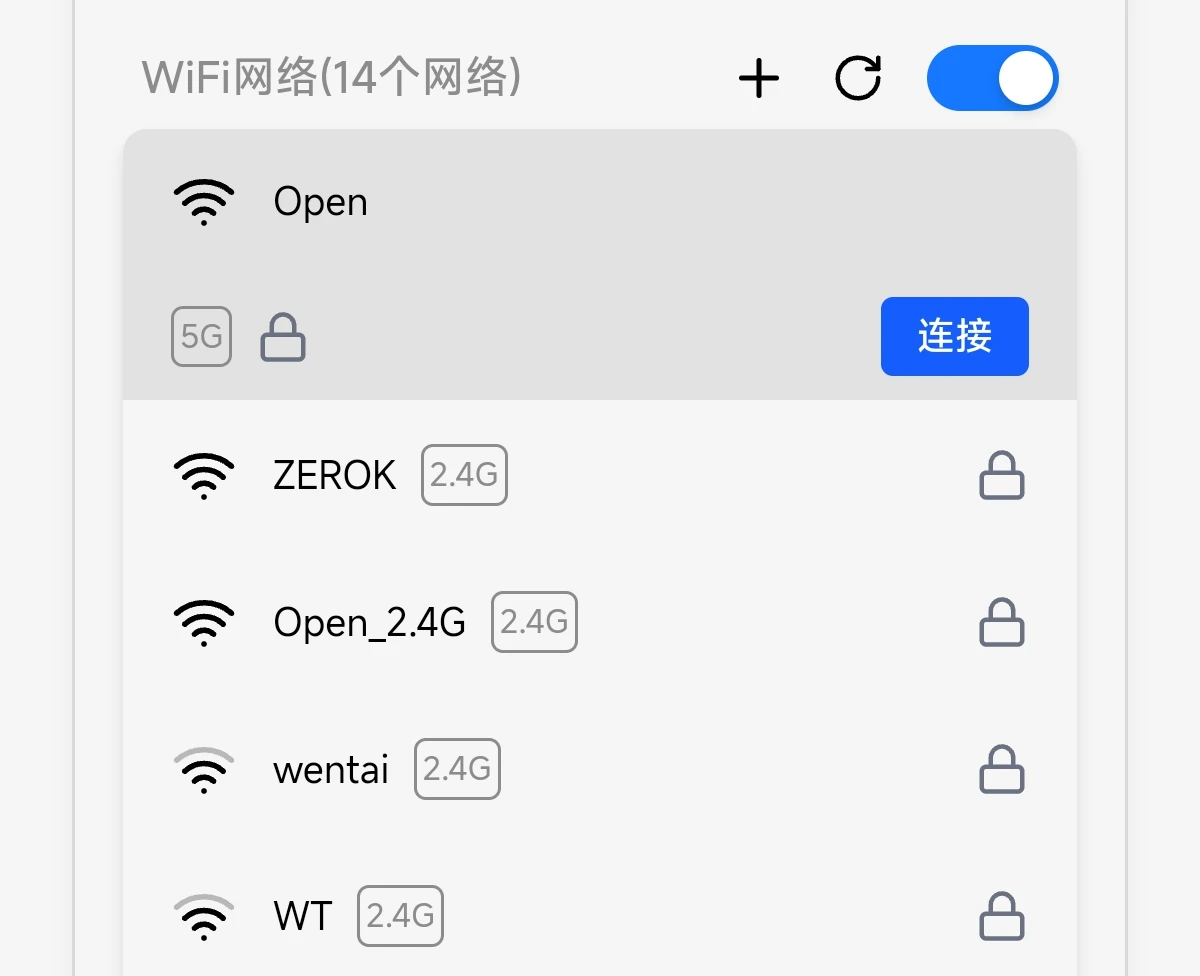
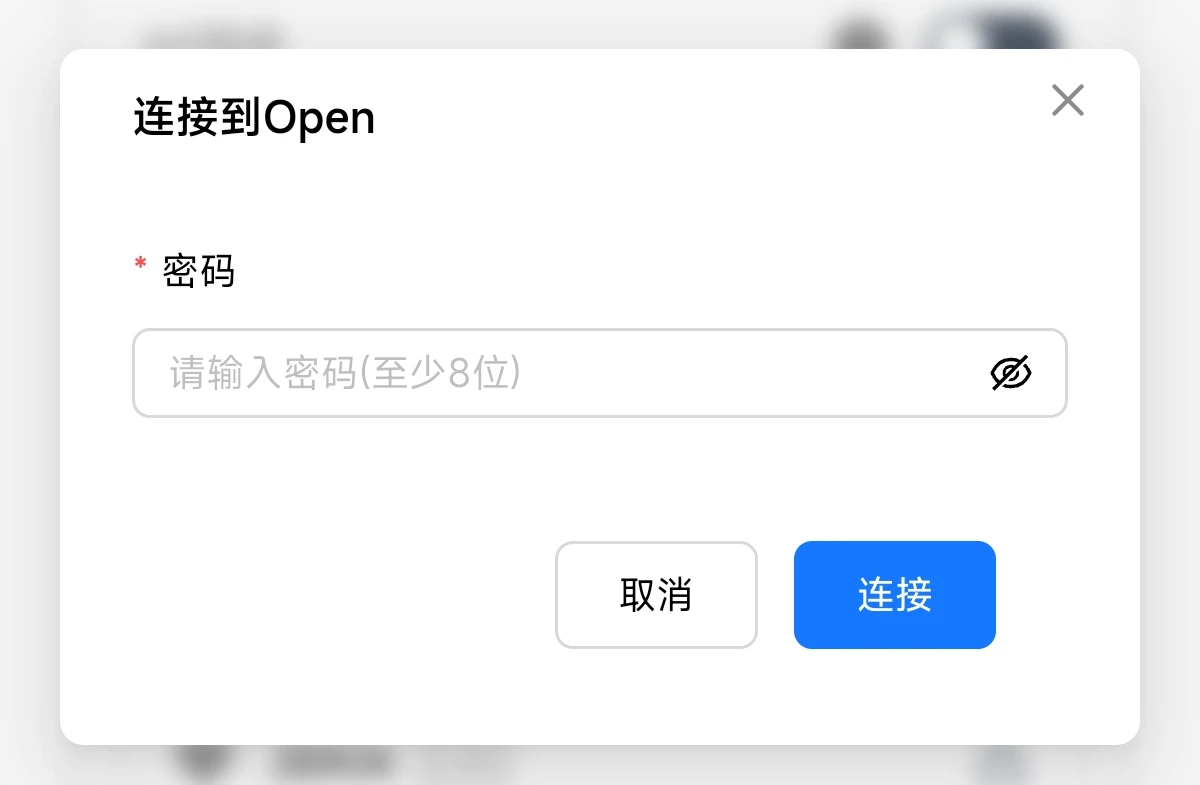
Connection status is displayed:
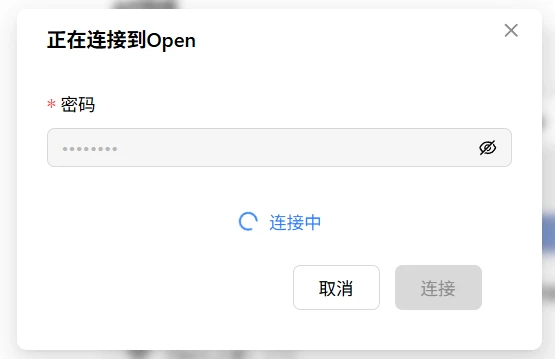
Connected:
Verify: After connecting → the card shows a "Connected" label and IP address. Password and config are auto-saved for next boot.
Manually add a network
Click the + button at the top of the list, then fill in SSID, security type, and password:
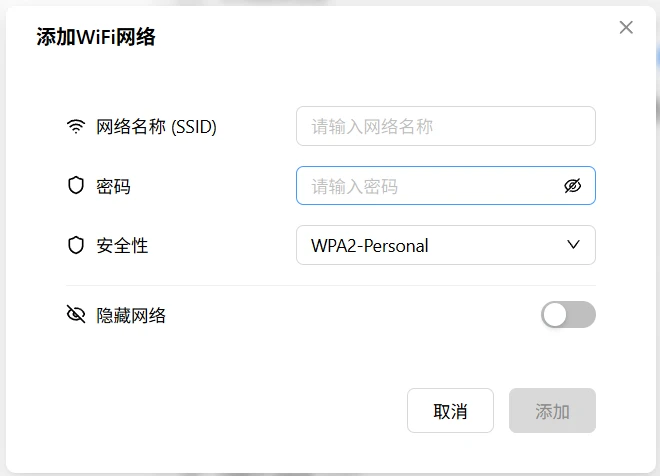
| Field | Description |
|---|---|
| Network name (SSID) | WiFi name |
| Security type | Open / WPA / WPA2 / WPA3 |
| Password | Required for encrypted networks |
Network Configuration
Click the Settings button on a saved network card to open the configuration dialog (three tabs):
Details
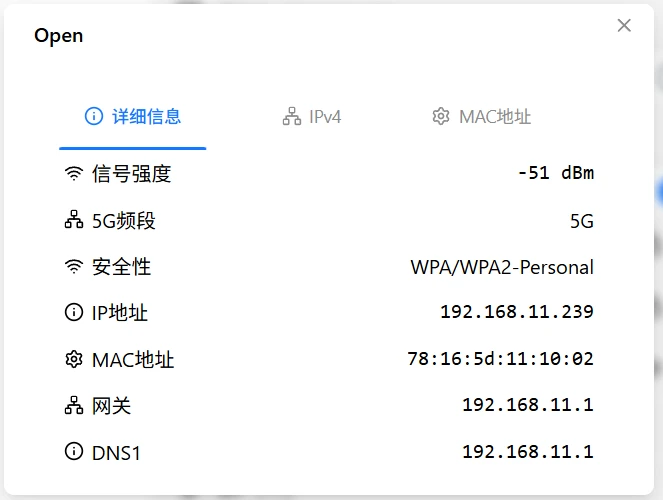
Read-only display of current network parameters: IP address, IPv6 address, MAC address, subnet mask, gateway, DNS1–3.
IPv4 Configuration
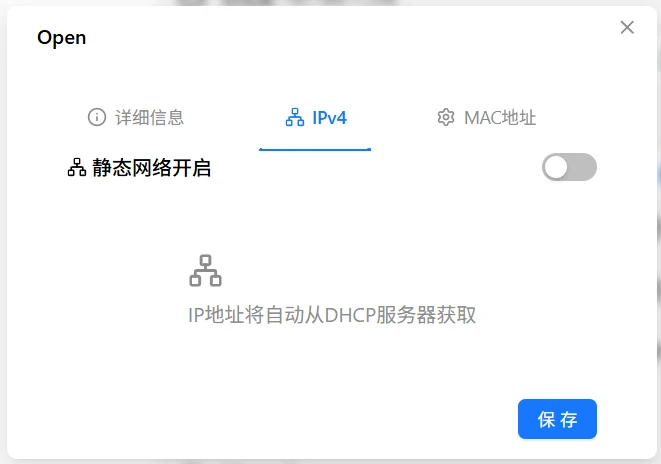
DHCP (default): Router assigns IP, gateway, and DNS automatically.
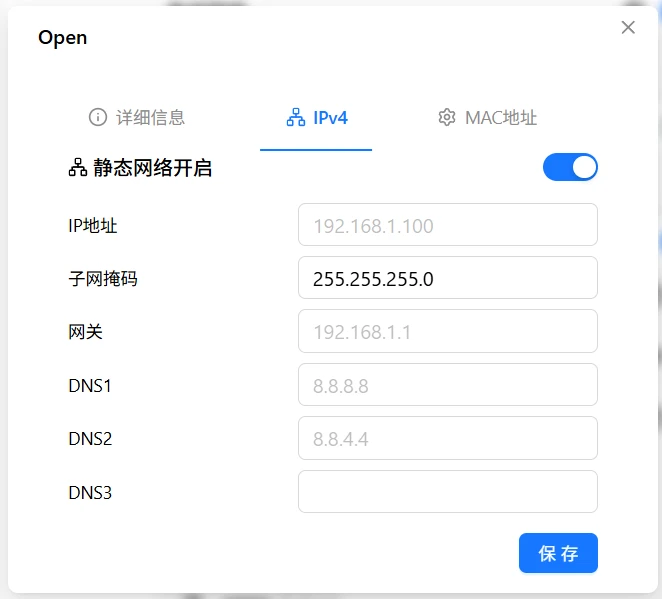
Static IP: Manually set fixed parameters.
| Field | Description | Required |
|---|---|---|
| IP address | e.g., 192.168.1.100 | Yes |
| Subnet mask | e.g., 255.255.255.0 | Yes |
| Gateway | e.g., 192.168.1.1 | Yes |
| DNS1 | Primary DNS | No |
| DNS2 | Secondary DNS | No |
| DNS3 | Tertiary DNS | No |
When switching to static IP, make sure the parameters are compatible with the current network — otherwise you'll lose connectivity.
Click save — takes effect immediately.
MAC Address
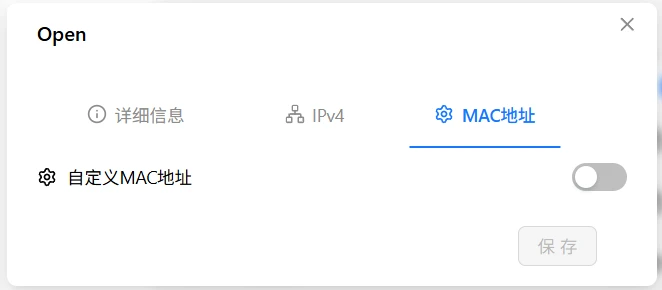
Default uses the factory MAC address (printed on the packaging box). You can also set a custom one:
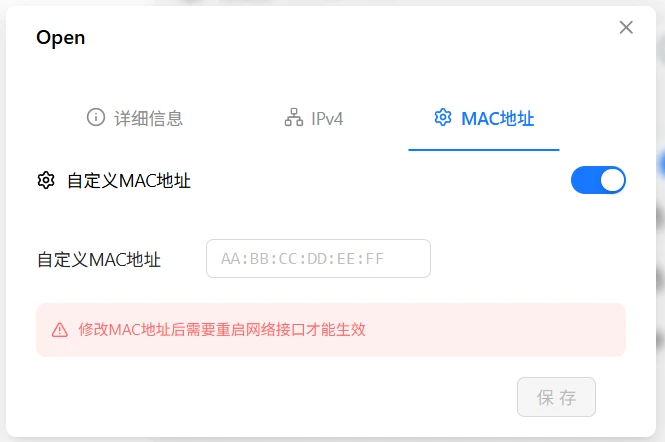
Format: AA:BB:CC:DD:EE:FF (six groups of hex, colon-separated).
⚠️ Changing the MAC takes effect immediately and may cause disconnection. Some routers refuse to recognize a new MAC. If you can't reconnect after changing it, use Provisioning Mode (long-press Button A 1–3s) to recover.
Verification
| Check | How |
|---|---|
| OLED | Is the IP displayed? |
| Web interface | WiFi card shows IP address |
| Network test | Ping the IP from another device |
Troubleshooting
| Symptom | Likely cause | Try this first |
|---|---|---|
| Can't find network | WiFi disabled, antenna not installed | Check switch, ensure antenna is attached |
| Wrong password | Typo | Re-enter, check case and special characters |
| Connection timeout | Weak signal, router MAC filter | Move closer to router, check router settings |
| No IP after connecting | DHCP not responding | Try static IP, or check router DHCP |
| Frequent disconnects | Weak signal, interference | Switch to 5GHz or use wired instead |
Signal Strength Recommendations
A stable connection requires at least level 2 (two bars):
- Level 3–4: Stable, suitable for video
- Level 2: Basically usable, occasional lag
- Level 1 or below: Unstable, not recommended
Weak signal? Try: reposition the device, add a WiFi extender, or use wired Ethernet.